Thymeleaf是一个java模板引擎,它在独立和Web应用程序中处理六种模板(HTML,CSS,TEXT,JAVASCRIPT,CSS和RAW)。
在这篇文章中,我们来学习如何在Spring MVC应用程序中配置Thymeleaf模板。
本例中使用的工具和技术是 -
- Spring MVC 5.0.3.RELEASE
- Servlet API 4.0.0
- Thymeleaf 3.0.9.RELEASE
- Java SE 8
- Maven 3.5.2
- Jetty Maven plugin 9.4.8
- Eclipse Oxygen.2 Release (4.7.2)
下面将要编写一个简单的Spring MVC应用程序,它将打印输出“Hello Spring MVC 5!”。
第1步 - 使用Maven创建Web项目
首先,用war包装创建一个maven项目。可以参考这篇文章来学习 - 如何在Eclipse IDE中创建一个Maven Web应用程序。
应用程序的最终项目结构如下所示 -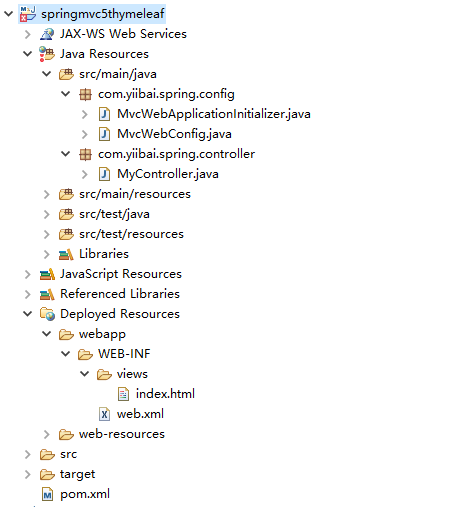
第2步 - 添加Jar依赖关系
要在Spring MVC应用程序中使用Thymeleaf,需要添加thymeleaf-spring5作为类路径的依赖关系。
打开Maven项目中的pom.xml文件,并在其中添加以下jar包依赖项。
<project xmlns="http://maven.apache.org/POM/4.0.0" xmlns:xsi="http://www.w3.org/2001/XMLSchema-instance"
    xsi:schemaLocation="http://maven.apache.org/POM/4.0.0 http://maven.apache.org/xsd/maven-4.0.0.xsd">
    <modelVersion>4.0.0</modelVersion>
    <groupId>com.voidme</groupId>
    <artifactId>springmvc5thymeleaf</artifactId>
    <version>0.0.1-SNAPSHOT</version>
    <packaging>war</packaging>
    <name>Spring MVC - Thymeleaf Integration example</name>

    <properties>
        <failOnMissingWebXml>false</failOnMissingWebXml>
        <maven.compiler.source>8</maven.compiler.source>
        <maven.compiler.target>8</maven.compiler.target>
    </properties>

    <dependencies>
        <dependency>
            <groupId>org.springframework</groupId>
            <artifactId>spring-webmvc</artifactId>
            <version>5.0.3.RELEASE</version>
        </dependency>
        <dependency>
            <groupId>org.thymeleaf</groupId>
            <artifactId>thymeleaf-spring5</artifactId>
            <version>3.0.9.RELEASE</version>
        </dependency>
        <dependency>
            <groupId>javax.servlet</groupId>
            <artifactId>javax.servlet-api</artifactId>
            <version>4.0.0</version>
            <scope>provided</scope>
        </dependency>
    </dependencies>
    <build>
        <plugins>
            <!-- Embedded Apache Tomcat required for testing war -->

            <plugin>
            <groupId>org.eclipse.jetty</groupId>
            <artifactId>jetty-maven-plugin</artifactId>
            <version>9.4.8.v20171121</version>
         </plugin>
        </plugins>
    </build>
</project>
第3步 - Spring MVC配置
在com.voidme.spring.config包下创建一个名为MvcWebConfig的@Configuration类。
要在Spring MVC中注册Thymeleaf视图,需要按如下方式定义SpringResourceTemplateResolver和SpringTemplateEngine bean方法,如下 -
文件: MvcWebConfig.java -
package com.voidme.spring.config;

import org.springframework.beans.factory.annotation.Autowired;
import org.springframework.context.ApplicationContext;
import org.springframework.context.annotation.Bean;
import org.springframework.context.annotation.ComponentScan;
import org.springframework.context.annotation.Configuration;
import org.springframework.web.servlet.config.annotation.EnableWebMvc;
import org.springframework.web.servlet.config.annotation.ViewResolverRegistry;
import org.springframework.web.servlet.config.annotation.WebMvcConfigurer;
import org.thymeleaf.spring5.SpringTemplateEngine;
import org.thymeleaf.spring5.templateresolver.SpringResourceTemplateResolver;
import org.thymeleaf.spring5.view.ThymeleafViewResolver;

@Configuration
@EnableWebMvc
@ComponentScan("com.voidme.spring.controller")
public class MvcWebConfig implements WebMvcConfigurer {

   @Autowired
   private ApplicationContext applicationContext;

   /*
    * STEP 1 - Create SpringResourceTemplateResolver
    * */
   @Bean
   public SpringResourceTemplateResolver templateResolver() {
      SpringResourceTemplateResolver templateResolver = new SpringResourceTemplateResolver();
      templateResolver.setCharacterEncoding("UTF-8");
      templateResolver.setApplicationContext(applicationContext);
      templateResolver.setPrefix("/WEB-INF/views/");
      templateResolver.setSuffix(".html");
      return templateResolver;
   }

   /*
    * STEP 2 - Create SpringTemplateEngine
    * */
   @Bean
   public SpringTemplateEngine templateEngine() {
      SpringTemplateEngine templateEngine = new SpringTemplateEngine();
      templateEngine.setTemplateResolver(templateResolver());
      templateEngine.setEnableSpringELCompiler(true);

      return templateEngine;
   }

   /*
    * STEP 3 - Register ThymeleafViewResolver
    * */
   @Override
   public void configureViewResolvers(ViewResolverRegistry registry) {
      ThymeleafViewResolver resolver = new ThymeleafViewResolver();
      resolver.setTemplateEngine(templateEngine());
      registry.viewResolver(resolver);
   }

}
WebMvcConfigurer接口提供了用于为Spring MVC应用程序定制基于java的配置的默认方法。
@EnableWebMvc注释用于从WebMvcConfigurationSupport(基于Java的MVC配置背后的主类)导入Spring MVC配置。
@ComponentScan扫描basePackages属性指定的包中的构造型注释(@Controller,@Service等等)。
SpringResourceTemplateResolver与Spring自己的资源解析基础结构集成。可以使用它来指定模板的位置,模板的模式,缓存过期的TTL等。
SpringTemplateEngine使用SpringStandardDialect,并支持Spring自己的MessageSource消息解析机制解析机制。
在Spring MVC中,需要声明和映射DispatcherServlet,以便使用java或web.xml配置来处理所有请求。
在Servlet 3.0+环境中,可以使用AbstractAnnotationConfigDispatcherServletInitializer类以编程方式注册和初始化DispatcherServlet,文件:MvcWebApplicationInitializer.java -
package com.voidme.spring.config;

import org.springframework.web.servlet.support.AbstractAnnotationConfigDispatcherServletInitializer;

public class MvcWebApplicationInitializer extends AbstractAnnotationConfigDispatcherServletInitializer {

   @Override
   protected Class<?>[] getRootConfigClasses() {
      return null;
   }

   @Override
   protected Class<?>[] getServletConfigClasses() {
      return new Class[] { MvcWebConfig.class };
   }

   @Override
   protected String[] getServletMappings() {
      return new String[] { "/" };
   }

}
第4步 - 创建Thymeleaf模板/视图
在src/main/webapp/WEB-INF/views文件夹下创建一个index.html文件,并在其中写入以下代码。
<!DOCTYPE html>
<html xmlns:th="http://www.thymeleaf.org">
<head>
<meta charset="UTF-8">
<title>SpringMVC5+Thymeleaf示例</title>
</head>
<body>
    <h1>Spring MVC + Thymeleaf Hello World example</h1>
    <p th:text="${message}"></p>
</body>
</html>
属性th:text =""被称为标准方言,用${...}标准表达式来评估对象。
第5步 - 创建控制器
在com.voidme.spring.controller包下创建一个@Controller类,并在其中写入下面的代码,文件:MyController.java -
package com.voidme.spring.controller;

import org.springframework.stereotype.Controller;
import org.springframework.ui.Model;
import org.springframework.web.bind.annotation.GetMapping;

@Controller
public class MyController {

   @GetMapping("/")
   public String index(Model model) {
      model.addAttribute("message", "Hello Spring MVC 5!");
      return "index";
   }
}
第6步 - 运行应用程序
使用以下maven命令来运行您的应用程序。
mvn jetty:run(该命令从其源代码部署webapp,而不是构建war)。
在浏览器的地址栏中输入:http:// localhost:8080 来测试应用程序。如果一切正常,应该会看到类似下面的页面 -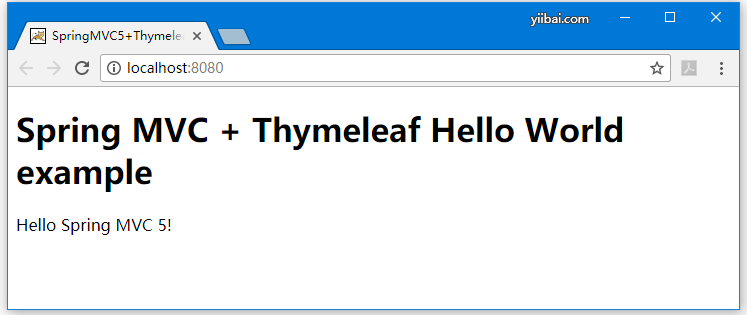
在接下来的Thymeleaf基础标签应用,大部分是基于此应用讲解。